There aren’t many muscle-building or strength-focused training programs that leave out the traditional lat pulldown. Many effective workouts include this classic, and for good reason.
Pulling in a vertical pattern strengthens your back, shoulders, and arms, while also building the muscles that support and stabilize your shoulder blades. This maintains healthy joint function which, in turn, keeps your entire upper body strong.
However, the lat pulldown isn’t enough to build thickness in your entire back and it’s not the only way to keep everything strong, healthy, and balanced. Eventually, you need to make some adjustments. Over-focusing on classic straight bar lat pulldowns without any change in angles, grip, or technique won’t be enough to for complete development.
If you know which muscles and attributes you’re looking to address, you can wisely choose the right exercises for better results. Here are 12 of the best alternatives to build a bigger, stronger, more complete back.
Best Lat Pulldown Alternatives
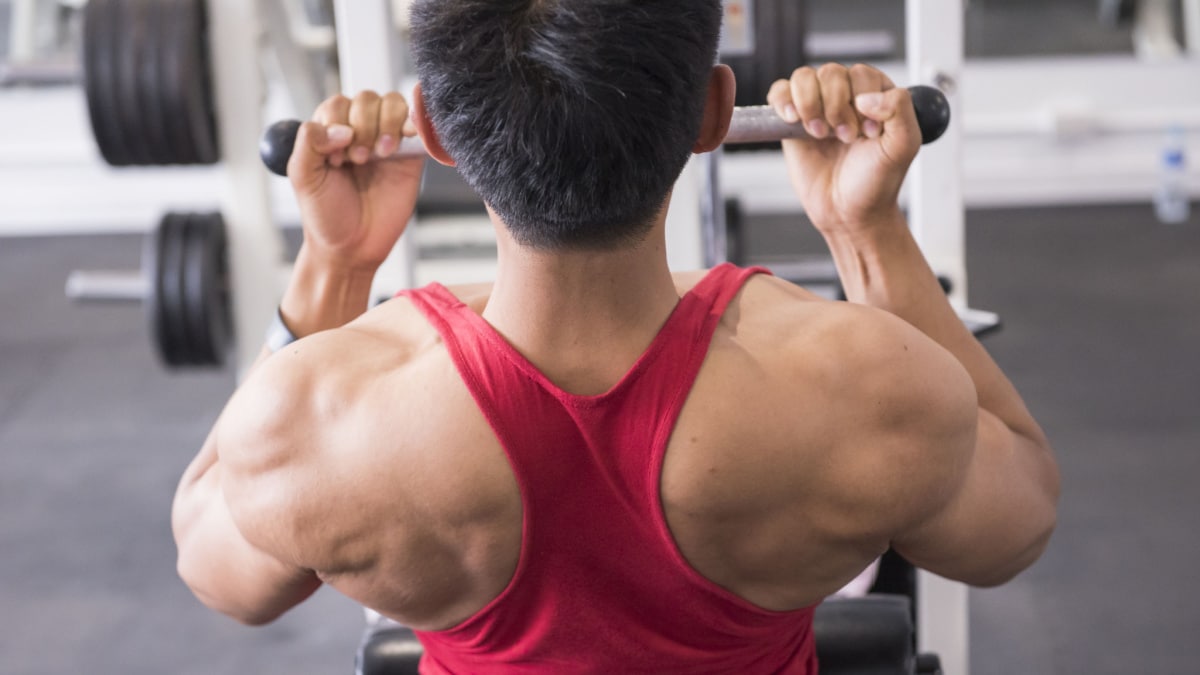
Behind-the-Neck Pulldown
“Scapular control is as cool as a really wide back,” said no person ever. Maybe you don’t do standard pulldowns to target the muscles that control your shoulder blades, but the basic movement does train muscles that control and rotate them. Pulling the bar behind your neck creates an even more efficient path.
Why Use the Behind-the-Neck Pulldown
By slightly altering the mechanics and path of this vertical pull, you train the supporting muscles of the shoulders and shoulder blades through a more complete range of motion. If you have suitable shoulder mobility and can perform the motion without pain, pulling behind your head allows you to target the muscles that rotate and lower the shoulder blades.
The kicker here is that when your shoulders and scapulae (shoulder blades) are well-positioned, with the behind-neck movement, your body can create higher levels of strength and develop more noticeable upper-back muscle.
How to Do the Behind-the-Neck Pulldown
Set up on a lat pulldown machine as you normally would. Use a long bar attachment and grab it with an overhand grip beyond shoulder-width. Sit with your arms straight overhead and shoulders “shrugged” up. Keep your forehead, chin, and sternum in line as you lean slightly forward. Let your arms be pulled slightly back, in line with your hips. Keep your body forward as you pull the handle down. Ideally, aim to touch the bar to the base of your traps, near your neck, but pull to a comfortable depth based on your overall mobility.
Think about trying to shrug your shoulders “down” as you bend your arms and drive your elbows down. In the bottom position, squeeze your shoulder blades down before straightening your arms and controlling the weight up. Let your shoulders rise as the cable pulls you into a controlled overhead lat stretch. Start with light weight and a full range of motion, and increase slowly without sacrificing form.
Rhomboid Pulldown
This movement may feel a little funky at first, but it’s a simple and effective way to shift focus from your big lat muscles to the smaller muscles of your upper and mid-back. To do these, you’ll use close or neutral-grip attachment and a very specific body angle.
Why Do the Rhomboid Pulldown
The rhomboids are deep muscles between the shoulder blades that pull your upper back together. If these supportive muscles don’t function well, there’s a good chance you will eventually deal with some shoulder dysfunction, pain, or injury. The rhomboid pulldown targets these muscles while also building muscle in the center of your mid-back, which for many, is lacking thickness and development.
How to Do the Rhomboid Pulldown
Grab the a close-grip attachment with your palms facing each other. Lock your legs under the pads, but lean your torso back to create a roughly 45-degree angle between your upper body and the floor. Pull your hands to your sternum and allow your elbows to flare out at a 90-degree angle to your shoulders. Keep your trunk braced and stable as throughout the exercise.
In the bottom position, think of pulling your shoulder blades together and your shoulders down to the ground. Control the weight on the way up, but keep your torso angled backward for the entire set.
Stiff-Arm Pulldown
This single-joint (isolation) exercise is arguably better at building lat thickness than traditional pulldowns because the work it done only by the lats with minimal assistance from the shoulders and arms.
Why Do the Stiff-Arm Pulldown
The stiff-arm pulldown, also known as a straight-arm pushdown, is great at building lat size and general mobility because the muscle has to overcome resistance through a long range of movement. You need to control the resistance through a long arc that puts your lats in a significant stretch toward the top. This is one of the few exercises that actually strengthens shoulder extension (raising the arm) along with training your shoulder blades to slide downward into a stable position.
How to Do the Stiff-Arm Pulldown
Attach a straight bar or rope to a cable near the top of your head. Stand tall, grab the bar or rope with your elbows slightly bent and your palms facing down (on a bar) or facing each other (with a rope). Maintain a bent-arm position as you “sweep” the attachment toward the top of your legs.
At the bottom, imagine pulling your shoulders behind your torso before you let the weight pull your arms back up. Control the weight and let your arms come all the way up for an active stretch at the top.
Lying Cable Pullover
Dumbbell or kettlebell pullovers are sometimes used as an alternative to pulldowns or, more specifically, an alternative to stiff-arm pulldowns, but expecting people to do those free weight exercises light enough to limit the contribution of the chest, arms, and shoulders is like asking them not to look at themselves in the mirror after a good arm pump. Lying cable pullovers are a more effective way to emphasize the contraction of the lats and other back muscles with relatively light weight and high tension.
Why Do the Lying Cable Pullover
This exercise gives you all the same benefits of stiff arm pulldowns — increased lat recruitment with limited additional muscles — while also increasing the duration that the muscle held under tension. And the longer the muscle is contracting under tension the more muscle and strength can be built. (1)
How to Do the Lying Cable Pullover
Lie on a flat bench with a cable set slightly above head-level. Use a rope attachment to allow for more range of motion. Grab the rope with your hands facing each other. Maintain a slight bend in your elbows and pull the rope toward your legs while keeping your lower back flat against the bench.
Keep your hands facing one another and try to touch your pinky fingers to the floor. In the bottom position, squeeze your shoulders together and think of pushing your triceps through the floor before controlling the resistance all the way back. Let the resistance pull your arms as far back as you can tolerate, above and behind your head.
Crossed Band Pulldown
This movement is perfect for using resistance bands rather than a cable machine because the tension of the bands combines with the long range of motion to target the smaller muscles of the back. The crossed band pulldown can also be called a “banded rhomboid pulldown” because it works those smaller upper back muscles similar to a rhomboid pulldown.
Why Do the Crossed Band Pulldown
By pulling the bands in a cross-body motion, you are training the muscles that move and support the scapulae with a specialized effort you wouldn’t be able work with cables. These supportive muscles not only keep your shoulders functioning properly, but they provide the stability needed to build high-level pressing and pulling strength, and they contribute to unique thickness of the back musculature.
The resistance bands allows for more tension at the end range (peak contraction), which is where most people need to build more scapular control. As you pull the band, it becomes more challenging and the muscles have to create more tension, compared to steady resistance with cable pulleys.
How to Do the Crossed Band Pulldown
Anchor two resistance bands to the top of a squat rack, pull-up bar, or other high and stable structure. Space the bands to be just outside the width of your shoulders. Grab the left band with your right hand and vice versa, and sit on the floor between them.
Keep a neutral spine, not arched or rounded, and pull the bands across the front of your body. Try to drive your elbows toward the floor behind you. Hold and squeeze the contacted position for one second before controlling the bands into a stretched position with straight arms.
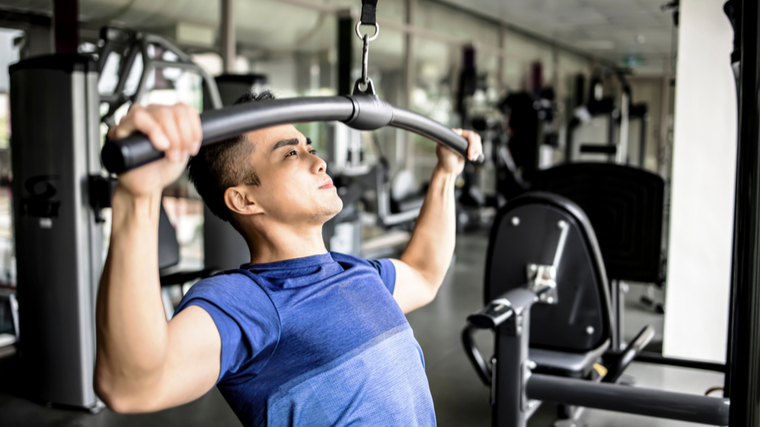
Supinated-Grip Pulldown
To keep your shoulders healthy and your upper back strength balanced, you need to do vertical pulls with your palms both facing away (pronated grip) and facing toward you (supinated grip). The supinated-grip pulldown, or “chin-down” (as opposed to a bodyweight chin-up), is a great option to build this supinated-position strength whether you can do chin-ups or not.
Why Do the Supinated-Grip Pulldown
This hand position doesn’t magically make it a biceps-only exercise. This grip variation trains the connections between the biceps, delts, and upper-back muscles differently from a pull-up or pulldown. (2) It also builds more balanced upper back stability and more shoulder mobility.
How to Do the Supinated-Grip Pulldown
Use a straight bar attachment and set up just as you would for a standard pulldown. Grab the bar with palms facing you and hands placed right at or a little wider than shoulder width apart.
Pull the attachment down by driving your elbows to the ground and try to touch it right below your collarbone. Squeeze the elbows down before controlling the cable back up.
Weighted Pull-Up
Most don’t think that pulling exercises that target the upper back should ever really be loaded heavy, but that line of thinking is a big mistake.
If you’re looking to build your back as big as you can, you need to combine high-rep sets with heavy weights. The weighted pull-up is an extremely effective, if slightly advanced, way to get the job done.
Why Do the Weighted Pull-Up
Pull-ups are typically done to build muscle size using only your body weight for as many reps as possible. But they can and should sometimes be loaded as heavy as possible and performed in rep ranges as low as three to five per set. This will expose you to new types of muscular stress that leads to muscle growth.
How to Do the Weighted Pull-Up
Take an overhand grip with your arms at, or just a little wider than, shoulder-width. Pull from a straight-arm hang to your chin or neck reaching bar-level. Warm-up with bodyweight-only sets and then add a weight using either a dip belt or a weighted vest. Start with a weight that you know you can do at least five reps with.
Perform multiple sets of three to five reps, adding just a little weight after each set. When you reach a very challenging weight and feel like you can only grind two or three reps, stick with this weight and try to do two to four more sets.
Mechanical Drop-Set Pull-Up
It’s important to do vertical pulling exercises with a variety of hand positions – overhand, underhand, and neutral-grip. Each grip is mechanically different in terms of difficulty and muscle recruitment, and this can be exploited to do more quality volume, which results in greater strength and muscle growth. (3)
Why Do the Mechanical Drop Set Pull-Up
A pronated (palms away) hand position is most challenging and prioritizes the lat muscle and upper back. A supinated (palms toward you) hand position is slightly easier and emphasizes the biceps and shoulders, and a neutral position (palms facing each other) offers the greatest leverage and is least challenging, recruiting the brachialis and shoulders. (4)
A “mechanical drop set” is a specialized technique that allows you to do as many reps as you can with the most difficult hand position. This causes the emphasized muscles to work hardest. You then continue to add more tension to the same muscle groups with a supinated grip, and finally using neutral-grip hand position. In total, you are able to do more volume than you could normally achieve using exclusively any one grip.
How to Do the Mechanical Drop Set Pull-Up
Take a shoulder-width overhand grip on a pull-up bar and lift yourself from a straight-arm hang to your chin near bar-level. As you reach muscular fatigue, let go and reset your grip to take a shoulder-width underhand grip. Continue performing additional repetitions until you reach fatigue again. Let go and finally take a neutral (palms facing) grip. Continue the last phase of the set with more reps.
One effective approach with this method is to pick a pre-determined rep count for each hand position. For example, if you can do five standard (overhand) pull-ups, you may choose to do two or three reps of each grip. This increases your pull-up volume significantly because you end up doing a total of six to nine repetitions instead of only five.
Inverted Row
The inverted row is often done with your body parallel to the floor, with your feet elevated to make it a true horizontal rowing motion. While this is a great variation to build the entire mid-back and lats, doing these at a 45-degree angle with your feet on the ground may be an even more efficient way to strengthen your back muscles similar to a lat pulldown.
Why Do the Inverted Row
This is a great option to replace or add more bodyweight movements. Strong or experienced lifters tend to neglect bodyweight training, maybe throwing in a few push-ups here or there, but that’s short-sighted. Bodyweight pulling movements, in particular, demand trunk stabilization and good scapular control which carry over to strength and stability in nearly all exercises.
If you can’t do bodyweight pull-ups, you need to find other ways to train your pulling muscles. The 45-degree inverted row uses your bodyweight to build strength and muscular coordination. This moderate angle makes it a different and effective way to strengthen the scapular muscles and still build the lats, comparable to a traditional pull-up or pulldown.
How to Do the Inverted Row
Set a barbell on a rack somewhere around ab-height. You can also use a Smith machine. You may have to adjust this higher or lower once in position depending on your arm length. Grab the bar with an overhand grip, with your arms a little wider than shoulder-width. Slide your feet out until your body is at roughly a 45-degree angle with the floor.
Keep your legs straight and pull yourself toward the bar. Aim to touch your chest to the bar before lowering under control and repeating for the set number of reps.
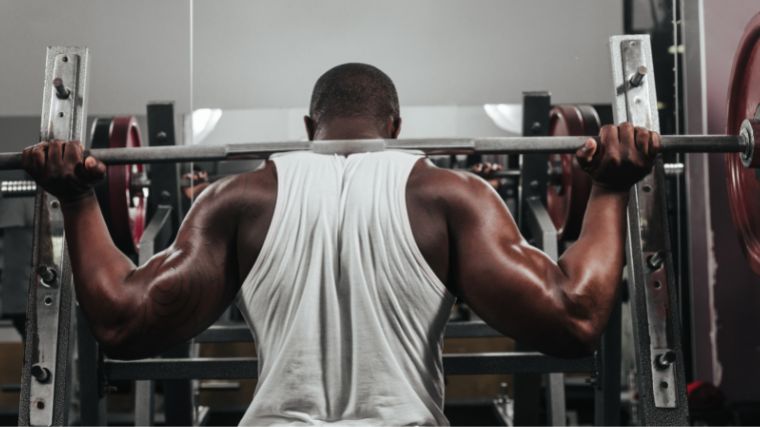
Ultra-Wide Grip Bent Over Barbell Row
The wide-grip barbell row might be one of the best exercises to increase thickness in your lats and traps while building strength that carries over to other big lifts. If you see someone who does this exercise often, heavy, and well, you can count on them having a big and powerful back.
Why Do the Ultra-Wide Grip Bent-Over Barbell Row
The ultra-wide grip row not only makes your lats wider, but it builds thickness in the mid-back better than many other exercises. The challenging wide grip also taxes your forearm muscles, making them bigger while building a stronger grip. The bent-over position requires your hips, trunk, and hamstrings to stabilize you body and create tension to support the weight. This total-body recruitment makes you stronger for pretty much anything else in the gym or on the field.
How to Do the Ultra-Wide Grip Bent-Over Barbell Row
Stand over a barbell with your feet hip-width apart. Hinge forward at the hips, squat down, and grab the bar with a palms-down grip as far wide as your grip will allow. The bar should be difficult to hold, but be sure you can keep it in your hands for the entire set. Stand straight up with the bar in your hands and your arms straight. Slightly bend your knees as you hinge from your hips.
Keep your knees slightly bent and bend forward until your back is close to parallel with the ground. Hold this position with your elbows locked and keep your back flat and your abs braced. Row the bar toward the bottom of your sternum. Control the weight back down to a straight-arm position, and repeat for repetitions.
Landmine Row
The landmine row can train the lats more without causing, or worsening, any potential shoulder problems because it places a unique demand on the body compared to other barbell or dumbbell exercises. The angle and leverage of the landmine create a different stress on the muscles and joints. It allows the lifter to adjust their body position and change the pull of the weight.
Why Do the Landmine Row
This exercise is done using a “v-bar” attachment, which requires a neutral-grip. This helps you contract your lats through a full range of motion while allowing the shoulder blades to move into a natural position. This not only helps to reduce shoulder pain but also reinforces and builds the shoulder-stabilizing muscles.
Because landmine row moves though an arc range of motion rather than a straight line, it creates different leverages for your muscles. For that reason, the weight typically feels heavier at the bottom and lighter at the top, which is the opposite of most exercises. This “reversed” strength curve means that the landmine row can train the lats differently by placing them under greater tension at the bottom position.
How to Do the Landmine Row
Put one end of a barbell in a landmine unit, or in the stable corners of a squat rack. Attach a neutral-grip v-bar handle around the free end of the barbell just below the collar. Straddle the bar, squat down to grab the handle, and stand up supporting the bar with straight arms. Make sure your back is almost completely parallel with the floor and your legs are slightly bent.
Row the bar up and try to touch your wrists somewhere between the bottom of your sternum and your abs. Lower the weight by straightening your arms under control. Try not to “hitch” or bounce as you lift the weight. The more strict the movement, the better it is for building muscle and strength.
Single-Arm Face Pull
Standard lat pulldowns are usually done in hopes of building wider backs, but it’s not really just about building back width. You need to build muscle on your upper back and across the backs of your shoulders, as well. There are more focused ways to develop these key areas than just using the simple pulldown.
Why Do the Single-Arm Face Pull
The single-arm face pull targets the rear delts (back of the shoulder) and the upper and inner parts of your back. These muscle groups not only need to be strong for optimal shoulder health and stability, but they need to be well-developed if you want your back to look as thick as possible.
Training one are at a time helps you narrowly focus on properly moving your shoulder and shoulder blade. Single-arm exercises like this also train your trunk to resist rotation so, as an added benefit, you’re also training core stability.
How to Do the Single-Arm Face Pull
Attach a single handle to a cable pulley at forehead-height. Grab the handle palm-down with one hand. Straighten your arm and step back until the cable slightly pulls on the weight stack to lift it up. Stand tall with your knees slightly bent and your feet about hip-width apart.
Keep your palm facing down as you pull the handle toward your ear. Think “chicken wing” to keep your elbow high and pointed out. Focus on pulling your shoulder blade in toward your spine. Hold and squeeze at this end position for one second. Don’t let your shoulder shrug upward. Control the weight back without letting it pull your shoulder too far forward as your arm straightens.
Benefits of Lat Pulldown Variations
There are three basic reasons to include this vertical pulling motion in your training: muscle size, muscular strength, and musculoskeletal health. Whichever reasons are on your goal list, there are plenty of effective movements to get the job done.
Increased Muscle Recruitment
Many people want to build their lats thicker and wider. Bigger lats give an athletic look many people want. Whether it’s on a bodybuilding stage, at the beach, or just for your own personal physique goal, a well-developed back includes wide lats as well as a solid upper and mid-back.
The lat pulldown, on its own, isn’t sufficient for targeting the multiple muscles involved in building complete back size.
Improved Strength Development
The more overall back strength you have, the more weight you can lift. Back strength is essential for a strong, stable upper body. This strength and stability carries over to big lifts like the deadlift, when maintaining proper position for efficient technique.
A stronger back even carries over to lower body exercises like the squat, to help your upper body transfer power from your legs through your core and upper body.
Joint Health
Healthy, well-functioning shoulders and shoulder blades (scapulae) are essential for any lifter. If you press weights overhead (up), you need to pull weights down. Basic muscular symmetry helps to reduce the risk of shoulder and upper body injuries. (5) Vertical pulling trains coordination and control between your shoulders and the scapulae, and it reinforces the postural muscles surrounding your scapulae and the entire middle back.
Get Down with All the Pulldowns
The lat pulldown is one of the most popular vertical pulling exercises for building muscle and strength. It’s an effective and time-tested exercise, but you still need to stress the upper and mid-back muscles with different angles and demands to create a maximum training effect. You can’t haphazardly add variations and hope for the best, because that can be a counterproductive waste of time. Review the exercises above, figure out which suit your specific needs, and plug them into your training plan. Soon enough, you’ll have all the variety you need for a well-rounded, and well-widened, back.
References
- Burd, N. A., Andrews, R. J., West, D. W., Little, J. P., Cochran, A. J., Hector, A. J., Cashaback, J. G., Gibala, M. J., Potvin, J. R., Baker, S. K., & Phillips, S. M. (2012). Muscle time under tension during resistance exercise stimulates differential muscle protein sub-fractional synthetic responses in men. The Journal of physiology, 590(2), 351–362. https://doi.org/10.1113/jphysiol.2011.221200
- Lusk, S. J., Hale, B. D., & Russell, D. M. (2010). Grip width and forearm orientation effects on muscle activity during the lat pull-down. Journal of strength and conditioning research, 24(7), 1895–1900. https://doi.org/10.1519/JSC.0b013e3181ddb0ab
- Leslie, Kelly & Comfort, Paul. (2013). The Effect of Grip Width and Hand Orientation on Muscle Activity During Pull-ups and the Lat Pull-down. Strength and Conditioning Journal. 35. 75-78. 10.1519/SSC.0b013e318282120e.
- Plantz MA, Bordoni B. Anatomy, Shoulder and Upper Limb, Brachialis Muscle. [Updated 2022 Feb 22]. In: StatPearls [Internet]. Treasure Island (FL): StatPearls Publishing; 2022 Jan-. Available from: https://www.ncbi.nlm.nih.gov/books/NBK551630/
- Drigny, J., Gauthier, A., Reboursière, E., Guermont, H., Gremeaux, V., & Edouard, P. (2020). Shoulder Muscle Imbalance as a Risk for Shoulder Injury in Elite Adolescent Swimmers: A Prospective Study. Journal of human kinetics, 75, 103–113. https://doi.org/10.2478/hukin-2020-0041
Featured Image: Wood Water Wall / Shutterstock
Source link
Originally posted 2022-11-16 17:02:54.